In IMPARGO, creating a transport order is quick and efficient. With easy input of pickup, delivery, and shipment details, users can swiftly assign resources and schedule deliveries. Real-time tracking keeps users updated on order progress. Simplify logistics with IMPARGO's streamlined order creation process.
1. Open Add Order Modal
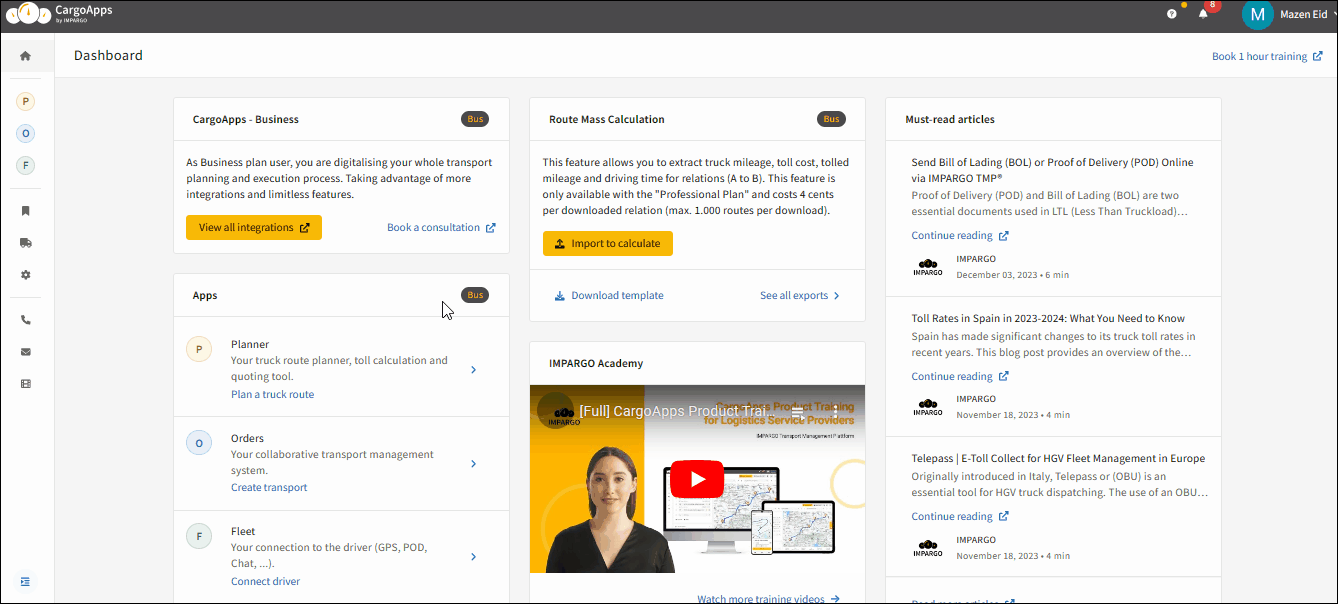
Step 1: Access Orders Module. Click on the blue letter “O” (tooltip: "Orders") in the left sidebar to open the Orders module.
Step 2: Open “Add Order” modal. In the Orders module, click on the "Create New Order" button on the top right corner of the interface. The order creation window which then opens will contain various fields and options for entering the necessary details.
You can now create and save an order without assigning a vehicle, trailer, or driver. This feature enables you to begin an order even if all asset details aren’t available yet. To enable cost calculation, you will need to assign the required assets (vehicle, trailer, and driver) to the order later on.
How to Create an Order Without a Cost Profile?
Step 1: Open the “Orders” module. Navigate to the → ORDERS module by clicking on “O” in the left sidebar.
Step 2: Initiate a new order. Click on “Create Order” and leave the asset fields (vehicle, trailer, driver) blank.
Step 3: Save the order. Save the order without assigning assets. The cost fields remain empty until assets are added.
Step 4: Assign assets later. When you have vehicle, trailer, and driver info, add them to the order. The system automatically recalculates cost fields and updates related data.
Step 1: Access profile selection. Navigate to "Vehicle & Trailer" or "Partner" section above the "Stops" section and open the submenu by clicking.
Step 2: Select own asset or partner cost profiles.
Choose "Vehicle & Driver" (if not already selected) and pick a “Vehicle”, a “Trailer”, and a “Driver”, if your own truck executes the order.
The system will display the combination's cost in €/h and €/km in the respective section.
Or choose "Partner" (if not already selected), pick a “Partner”, if a partner / subcontrctor executes the order.
Based on the cost model type (daily rate, mileage rate or full and empty mileage rate) the system will display the corresponding rates.
Note: If you do not yet know which vehicle, trailer, or driver will carry out the order, you can simply leave these fields blank. Please note that in this case, no transport-related costs will be calculated.
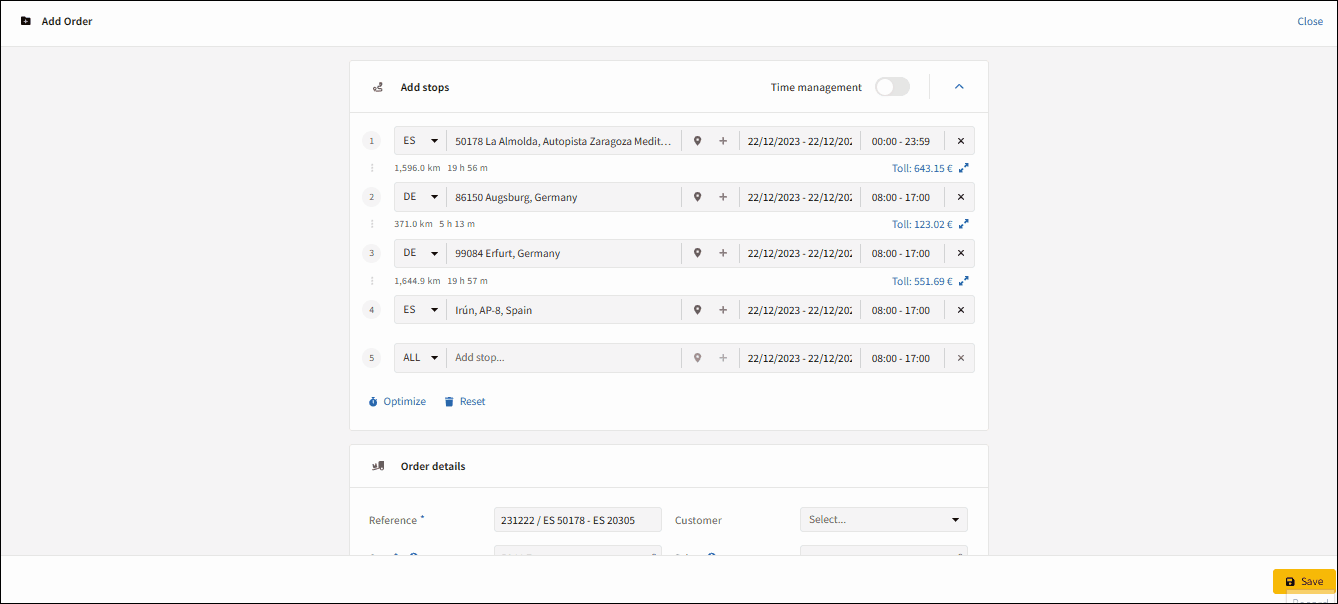
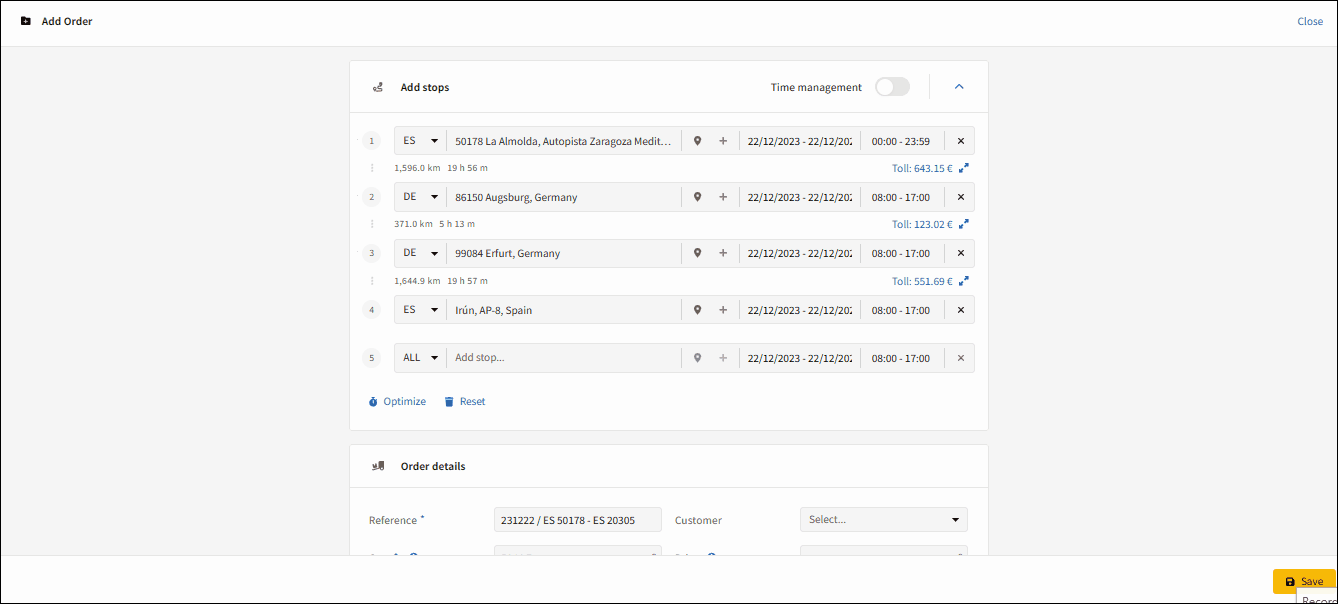
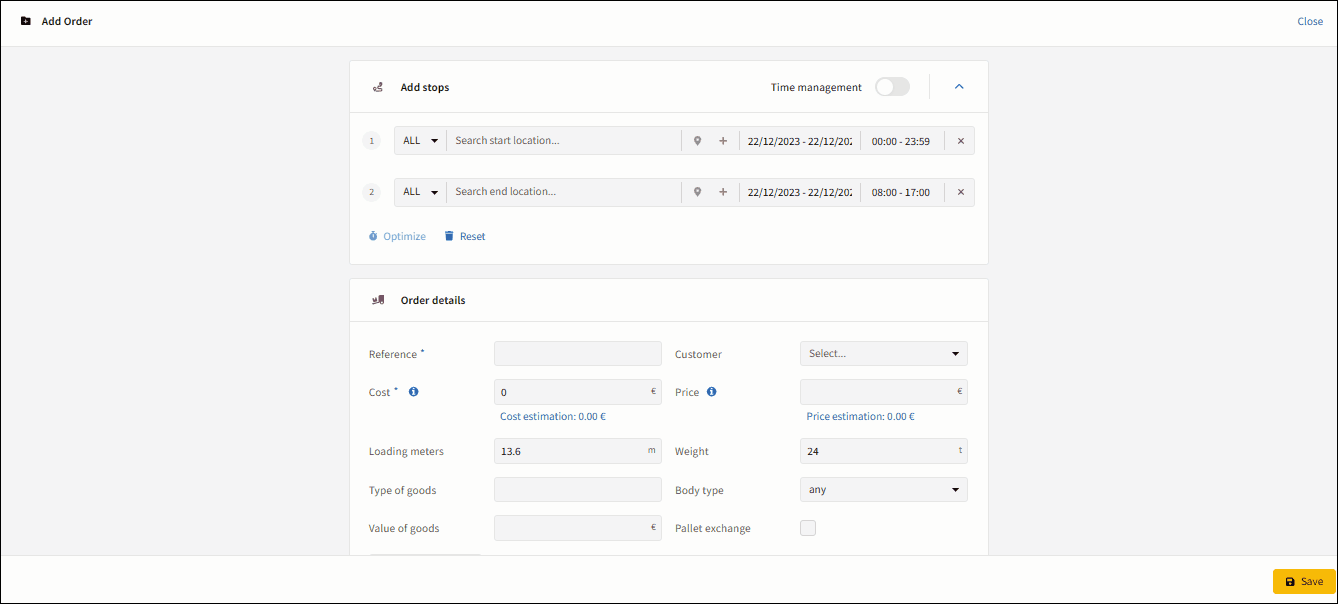
4. Add Stops
Step 1: Navigate to the "Add Stops" section. Localize the “Add Stops” section.
Step 2: Input addresses.
To add a stop, input the addresses of your desired locations. Use the Address text box and be as specific as possible.
As soon as you find the location, you can add more details to the stop by clicking on the location button directly on the right of the entered address.
A modal will open which allows you to change the address, save the address with a name or add data of a contact person (name and email).
The route will be calculated instantly as you add another stop.
Step 3: Add additional stop data. Click on the (+) icon near each stop to input additional stop data. This step is crucial for providing detailed information about each stop.
Select stop activity: Prior to adding loading units, choose the stop activity from the four activity options: loading, unloading, parking, and refueling.
Add loading unit:Add a loading unit if applicable. Read more in next section.
Add time at stop:After selecting the stop activity, you can also specify the time spent at the stop. This information is valuable for overall operational time as well as cost calculation and will be visible to the driver in the DriverApp. This deafult time can be set in general setting.
Add stop comment:Specify a comment per stop, if additional information need to be provided to the driver via the DriverApp.
Step 1: Open the “Add loading units” modal Within the same submenu, locate and click on “Add loading units” under the Activities section.
Step 2: Add loading unit details In the subsequent menu, include the following details for the loading unit and click “Add x loading meters”:
Choose loading unit type
Add or adapt dimensions, loading meters and weight
Add quantity
Choose stackability
Add or adapt stops
Add loading and unloading references
How loading meters and pallet spaces are calculated
The system uses the entered dimensions, quantity and stackability to automatically estimate loading meters and pallet spaces. Larger dimensions or higher quantities increase the required loading space, while stackable units reduce the overall footprint. This helps ensure that vehicle capacity is used efficiently and that planning remains compliant with operational constraints.
By following these steps, you ensure that your stops are optimized with the appropriate loading units, contributing to a streamlined and compliant logistics operation. The added details also provide comprehensive information for cost calculation and are accessible to drivers through the DriverApp.
Time Scheduling enhances precision in planning and execution, crucial for meeting tight schedules and ensuring timely deliveries.
To schedule the time for your truck tour, follow these steps:
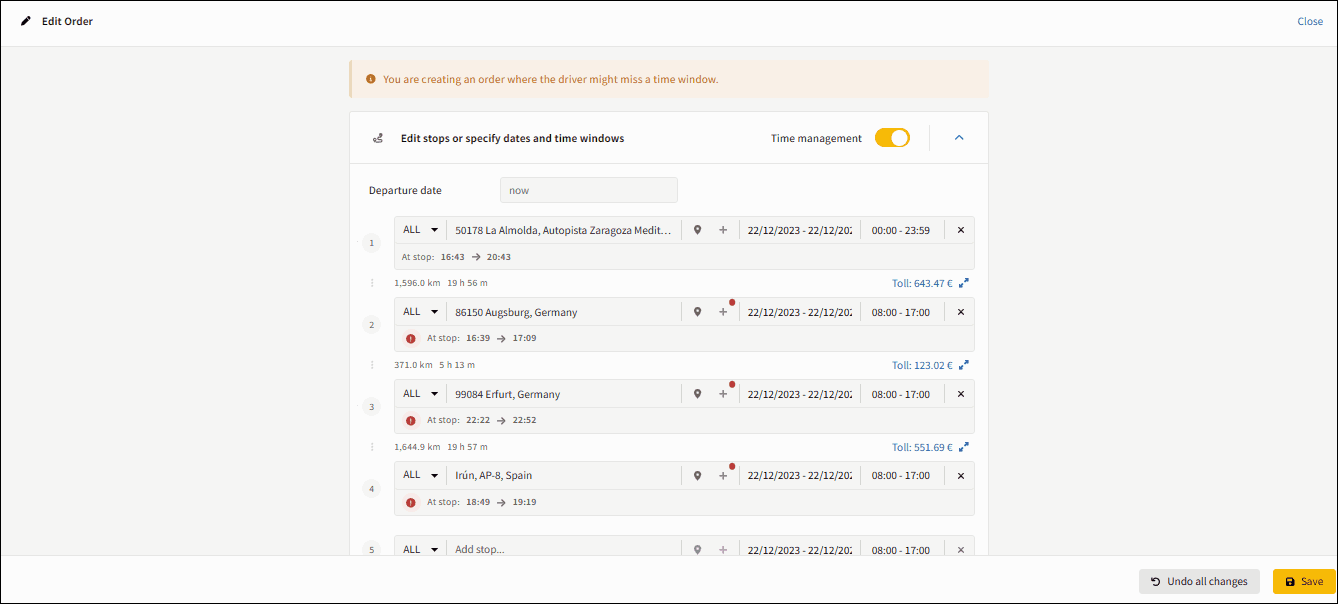
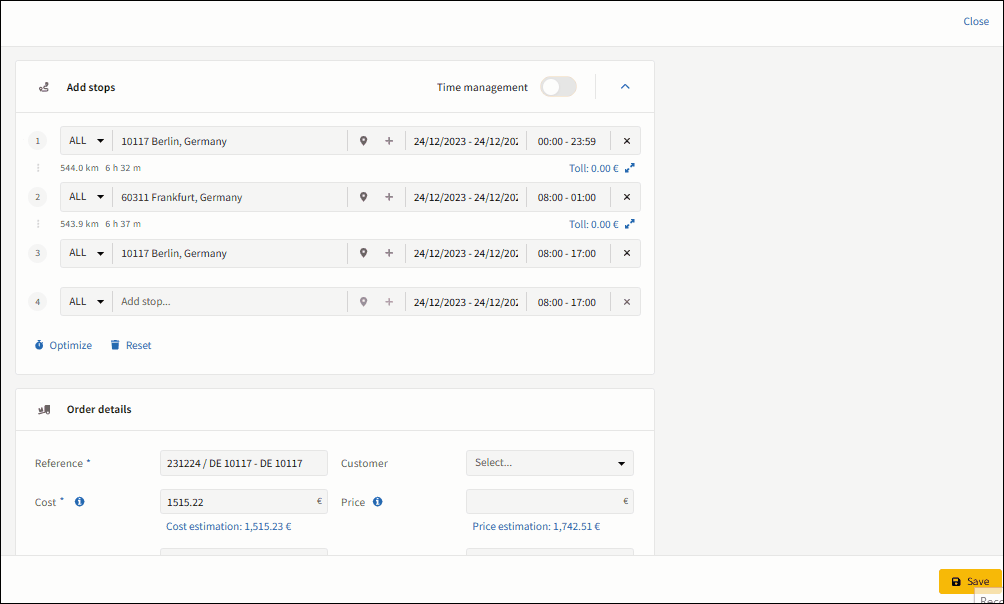
Step 1: Activate time management. Start by activating the time management function located conveniently above the address entry. Once activated, this feature empowers you to set arrival and departure times for each stop or optimize time windows.
Step 3: Optimize with time windows. Utilize the time window optimization feature to plan complex tours with specified time windows. This ensures that your route is not only optimized for efficiency but also adheres to time constraints at each stop.
Manually move the stops per drag & drop.
Or alternatively click on “Optimize” below the stops and choose either “First stop fixed” for optimization in a row or “First and last stop fixed” for a roundtrip optimization. The system will try to keep all time windows. If it is not possible to keep the time windows, the system will show a red alert.
Time Window Optimization is particularly beneficial for routes with multiple stops and intricate scheduling requirements.
Step 4: Identify errors. Keep a vigilant eye on the system for any red warnings associated with stops. A red warning signals an issue with the time window for the corresponding stop. Hover over the warning with the mouse to understand the reason:
"Arrival and departure do not match with the time window": Time window cannot be met - try to add another time window or execute the stop another day.
“Stop is finished 1 day(s) after departure”: The stop can only be executed on the next day.
To resolve time window discrepancies, access additional stop data located near the stop in question by clicking on (+) icon. This provides comprehensive information related to each stop, including time windows.
Once you've added your stops and additional stop data, the "Order Details" section offers a range of customization options to tailor your transport order to specific preferences and requirements.
Here's how you can make the most out of your transport order creation:
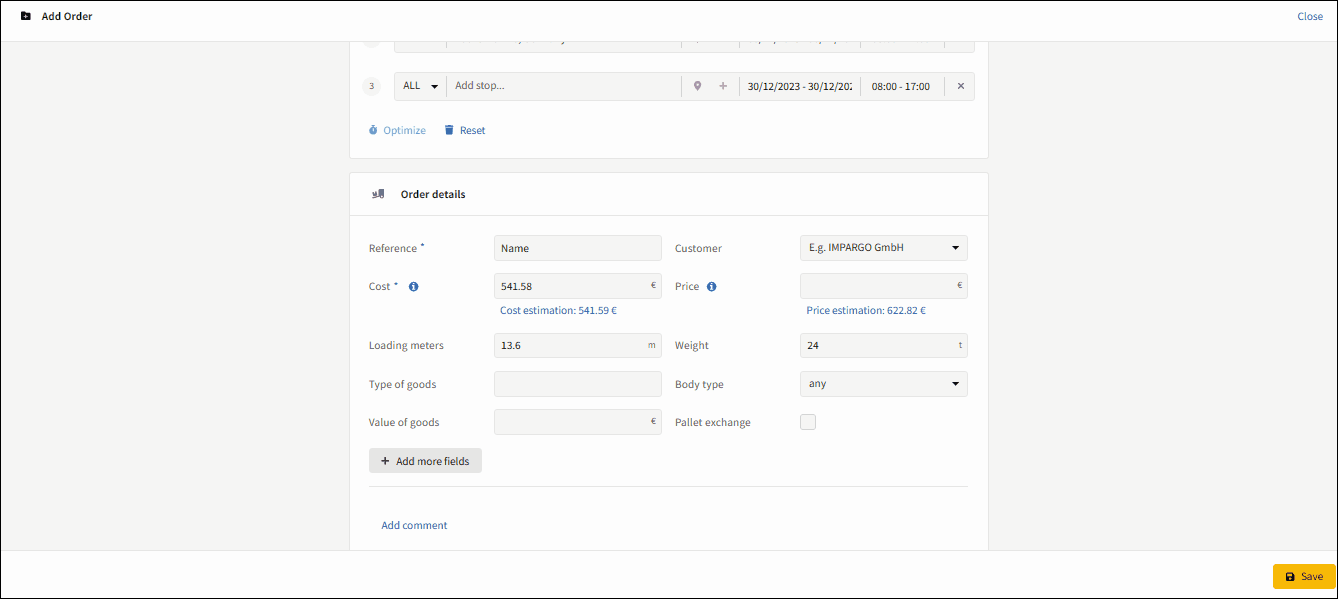
Step 1: Add reference or preferred name. As soon as you enter two stops we automatically create a reference number for each transport. However you can overwrite this number with your preferred reference or name, making it more easily identifiable within the system.
Step 2: Validate cost. The system provides an estimated cost for your planned transport based on the cost of the selected company, vehicle, trailer and driver profiles. This gives you a preliminary understanding of the financial aspects of your transport. The cost is automatically saved with the trip but can be overwritten, if applicable.
Step 3: Add transport price. The price estimation is a reference point for dispatchers to ensure profitability of the company. Click on the blue “Price estimation” to take over the suggestion, keep the price field empty or add your negotiated price.
Step 4: Add additional order details.
Loading meters
Weight
Type of goods
Body type
Value of goods
Pallet exchange
Note: Any other additional field can be customized and added to the add orders interface. Please contact our customer support to get more information.
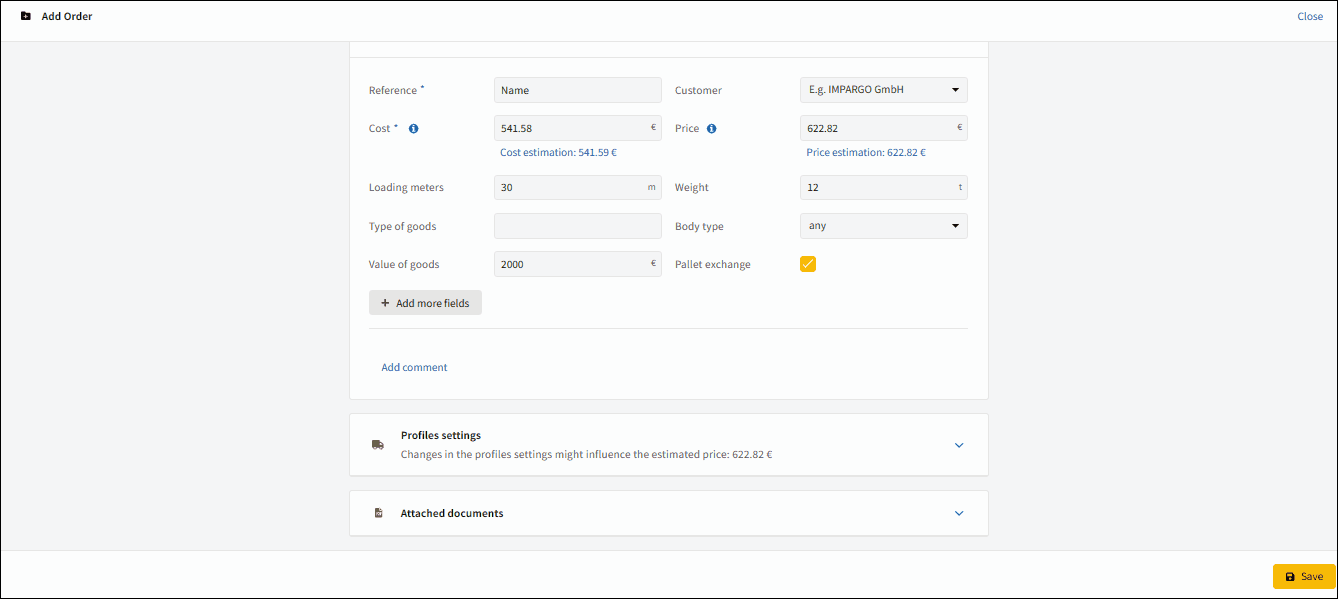
8. Edit Profile Settings
The "Profiles Settings" section allows you to make crucial adjustments that directly impact the estimated cost and price of your transport order.
To calculate accurate price and cost estimates for your transport order, follow these steps:
Step 1: Add additional charges. Include any additional charges that may apply to the transport order, ensuring that the final cost accurately reflects all relevant expenses.
Step 2: Add additional time. Factor in additional time-related costs, if applicable to your specific logistics operation. This option allows for a more comprehensive estimation of the overall cost.
Step 3: Include or exclude tolls. Include toll charges in the overall price calculation by checking the designated box. This ensures that toll expenses are considered in the cost and pricing structure.
Note: If you change the profiles settings the system will automatically recalculate the cost and pricing based on the entered details and predefined settings. This automation streamlines the process and ensures accuracy in cost estimation.
By carefully adjusting these profile settings, you can fine-tune the estimated cost and pricing of your transport order, aligning them with your business priorities and operational requirements. The flexibility offered in this section allows for a dynamic and tailored approach to cost optimization in logistics planning.
Step 1: Locate "Attached Documents" section. During the order creation process, scroll down to the bottom of the page and find the designated "Attached Documents" section.
Step 2: Upload documents. Click on the designated box or employ the drag-and-drop functionality to upload your documents seamlessly.
Note:
Accepted filetypes for document upload are PDF ('.pdf'), Excel ('.xls', '.xlsx', ‘.csv’), Word ('.doc' and ‘.docx’) as well as pictuers ('.bmp', '.webp', '.gif', '.jpeg', '.jpg', ‘.png’) and others ('.kml').
Documents are shared with stakeholders like drivers (DriverApp), subcontractors (sharing link for subcontractors) as well as customers (order confirmation email or tracking link). If a document new document is uploaded by a driver the dispatcher receives an upload email notification.
Examples of documents you might need to include in your transport order:
Bills of Lading, Itineraries, Schedules, or Equivalent Documents: Include documents that specify trip origin and destination, providing a comprehensive overview of the journey.
Dispatch Records, Trip Records, or Equivalent Documents: Upload records detailing dispatch and trip information, such as locations and dates, to enhance order tracking.
Expense Receipts: Retain receipts for on-duty not-driving expenses like meals, lodging, and fuel, ensuring accurate expense documentation.
Electronic Communication Records: Include important messages and emails related to the trip for compliance and communication history.
Payroll Records, Settlement Sheets, or Equivalent Documents: Upload documents that showcase detailed payment information for drivers, ensuring transparency in compensation.
Records of Duty Status (RODS): Essential for tracking hours of service and compliance, upload RODS to maintain accurate records of driver duty status.
Toll Receipts (if applicable): For carriers using paper RODS, upload toll receipts to provide a complete picture of incurred costs during the journey.
By incorporating these documents into the order creation process, you enhance the visibility, compliance, and efficiency of your logistics operations. This ensures that all essential information is readily available and organized, facilitating a smoother workflow and comprehensive record-keeping.